 |
| Photo by Annika Madejska |
I do other things aside from textile adventures and loppis hunting, sometimes I also bake. I love to make tasty treats but rarely make the time and effort. My mother is a fantastic cook and the amount of knowledge stored in her brain just amazes me. I realize that she wont be around forever and I need to learn as much as I can from her, so this christmas my mother agreed to teach and help me make the traditional wafer "Gorån" (good wafer). This is result:
The recipe:
(which is supposed to make 35 - we got about 60)
210g melted butter - my mother uses the normal salted kind.
200g sugar
2 eggs
2 eggyolks
400g wheat flour
1 tsk hjorthornssalt (Ammonium Carbonate) What this is is explained here: http://www.swedishfood.com/hjorthornssalt
Edit: I now have learned that in german it is called Hirschhornsalz.
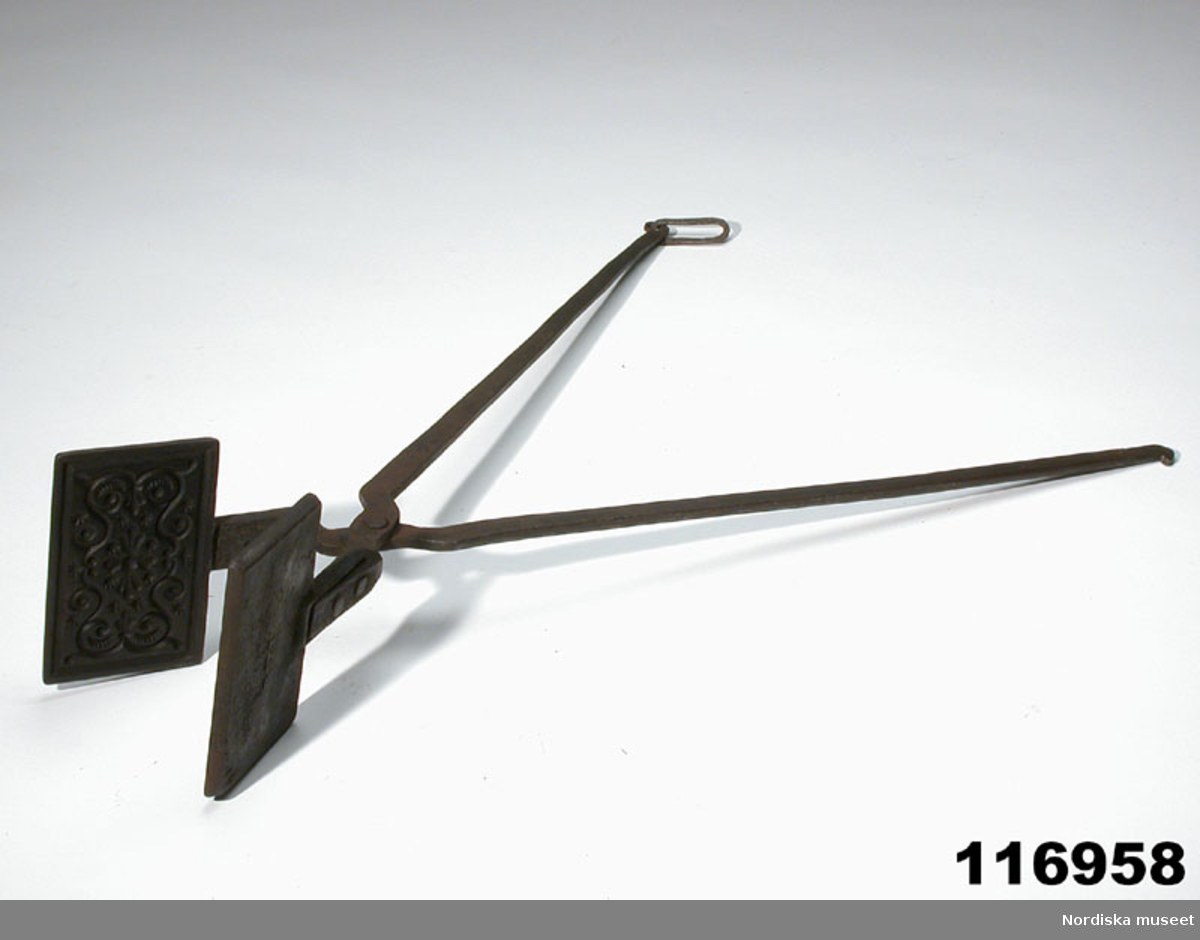
Traditionally this was made in a cast iron thingy with pretty patterns that would press into the wafer:

When I grew up my grandmother still used hers, but my mother had an aluminium one that made three at a time but the inner one often got too hot and overbaked so she only made two at a time. Now technology has entered the house and my mother owns this electric iron:

It has the benefit of controlled temperature and lights that signals when it is ready to do what it should! Very efficient compared to the traditional ones.
The dough is the part where the experience really comes into play. I had no idea about how the dough should look and feel when ready. Depending on what type of iron you are using you either want the dough loose enough to expand into all the crevices or hard enough to beable to use the rolling pin and make a sheet as thin as you can while still be able to handle it...carefully...
According to the mother it is the depth of the pattern that determines if you roll out the dough or make a sausage that will expand into the wafer iron. The expanding kind is also often a thicker wafer than what you can make in the electrical one.
So depending on what type of iron you are using, make the dough accordingly. The amount of flour is what you adjust to get the dough you need.. Since the dough has to sit overnight it is much, much looser when you first make it than it will be the next day. This reminds me a lot of how our gingerbread cookie dough behaves. The dough is best kept in the fridge, and we kept ours in the fridge during the bake since when it gets warmer it also softens and gets almost impossible to handle. Another benefit of keeping it in the fridge was that my father was not able to steal as much of it as he would have liked.
Dough ready, iron warmed up I got to do the rolling. I took just enough dough to make one bake in the iron and with liberal use of more flour I got it really nice and thin. My mother has a template in plastic that she uses when cutting the rolled out dough. The template is the size of the finished wafer but you cut away the excess dough so its about 1-2 cm larger than the template. Carefully place it in the iron - there is no chance to move it after it has touched the iron so place it right! Now my mother took over and this time the wafer was done in about a minute and a half. Nice golden color is what you want, and it quickly burns. Then you immediately cut away the excess so you end up with the nice wafer - and a lot of remnants. Those can keep hungry dads at happy despite not being able to get to the dough.
This is what we ended up with:

Next time I will try to convince my mother to teach me how to make the rolled up wafers:

Inga kommentarer:
Skicka en kommentar